
Welcome to PlusOne FX
PlusOne FX turns one finished lead vocal into two new supporting takes of the same part: Take A and Take B. Same singer, same lyrics, same notes, but each take has its own timing, pitch behavior, tone and dynamics, as if the singer had stepped back to the mic twice more.
The EVA RePerformance Engine analyzes your recording, re-performs it twice and rebuilds each take as its own waveform. Everything runs locally inside the plugin: no voice model, no cloud, no audio upload.
You get three separate layers to work with: the Original, Take A and Take B. Use all three as a vocal stack, keep only one supporting take, or print either take to audio and process it like any other vocal track.
What PlusOne is not. It is not a chorus, a stereo widener or a delay-based doubler. Those effects reuse your original audio; PlusOne generates new performances. It is also not a harmony generator: the takes sing the same notes as the lead.
Installation and system requirements
PlusOne FX is a 64-bit effect plugin for VST3, AU and AAX hosts on macOS, and VST3 hosts on Windows.
Use a stereo track or bus. PlusOne works on mono and stereo tracks, but on a mono track the original and both takes are summed to the center, so you lose the width of the stack. For the full effect, insert it on a stereo track or, better, on a stereo bus (see Workflows).
Latency is fixed at 220 ms. PlusOne reports it to your DAW, so keep plugin delay compensation switched on and the takes stay aligned with the session. Why the latency is there is explained in Why PlusOne has 220 ms of latency.
System requirements
PlusOne processes each instance on a single CPU thread, so the speed of one core matters more than the number of cores. When you use several instances on different tracks, your DAW usually spreads them across cores.
| macOS | Windows | |
|---|---|---|
| Minimum CPU | Intel Core i5 or i7, 2 cores, 2014 or newer (for example Mac mini 2014, MacBook Air 2017) | Intel Core i3 or i5, 2 cores, 2015 or newer, 2.5 GHz or faster, or AMD Ryzen 3 |
| Recommended CPU | Intel, 4 cores, 2017 or newer, or any Apple Silicon Mac (M1 or newer) | Intel Core i5 or i7, 8th generation or newer (for example i5-8250U), or AMD Ryzen 5 (for example 3550H) |
| Minimum OS | macOS 10.13 on Intel, macOS 11 on Apple Silicon | Windows 10, 64-bit |
| Recommended OS | The current macOS | Windows 10 or 11, 64-bit |
| Memory | 4 GB RAM minimum, 8 GB recommended | 4 GB RAM minimum, 8 GB recommended |
| Disk space | About 50 MB per format | About 50 MB |
| DAW buffer | 512 samples or lower; 1024 on dual-core MacBook Air and Mac mini | 512 samples or lower; 1024 on slower dual-core laptops |
| Formats | VST3, AU, AAX, 64-bit | VST3, 64-bit |
| Architecture | Universal build, native on Intel and Apple Silicon | Intel and AMD |
| Download size | 57.4 MB | 10.9 MB |
On Windows, Celeron, Pentium, Atom, Core m3 and Y-series processors are not recommended.
On a recommended computer, one instance uses only a small share of the CPU, so you can run many instances in a session. On a minimum-spec computer, a 512-sample buffer can cause occasional clicks: raise the buffer to 1024 samples, switch Quality to Draft, or bounce offline. PlusOne does its main work in blocks of 1024 samples, so on slower computers buffers of 128 or 256 samples are likely to click.
Install on macOS
- Download the macOS installer (.pkg) from My Account → My Downloads on evainstruments.com.
- Open the .pkg file and follow the installer. It places the VST3, AU and AAX plugins in the correct folders, so there is nothing to copy by hand.
- Restart your DAW, or rescan plugins if PlusOne does not appear.
Install on Windows
- Download the Windows .zip archive from My Account → My Downloads on evainstruments.com.
- Unzip it. Inside you will find a short instruction file and the PlusOne FX .vst3 file.
- Copy the .vst3 file to your VST3 folder, usually
C:\Program Files\Common Files\VST3. - Restart your DAW, or rescan plugins if PlusOne does not appear.
Quick Start
- Insert PlusOne after your vocal editing. Put it on a stereo vocal track after comping, tuning and timing correction, so the takes inherit the cleaned-up performance.
- Lower INPUT a few dB. Three voices at the same level sum to a much louder signal than one, so a little headroom keeps the output from clipping.
- Press play and turn up BACKINGS. At 0% you hear only the original. As you raise it, both takes get louder and spread wider across the stereo field. Around 30–50% thickens and widens the lead; toward 100% gives a full multi-voice stack.
- Press NEW TAKES only when you need to. It replaces the current pair with a new one. Use it if a take has a glitch or drifts too far from the lead in timing or pitch.
- Turn on DS, EQ and SPACE. These preset processors place the backings slightly behind the lead, for a finished sound straight away.
The current take pair is saved with the project, so it sounds the same every time you reopen the session.
Interface overview
The window is organized around one big control: BACKINGS in the center sets how much of the two takes you hear, with each take’s own strip on either side.
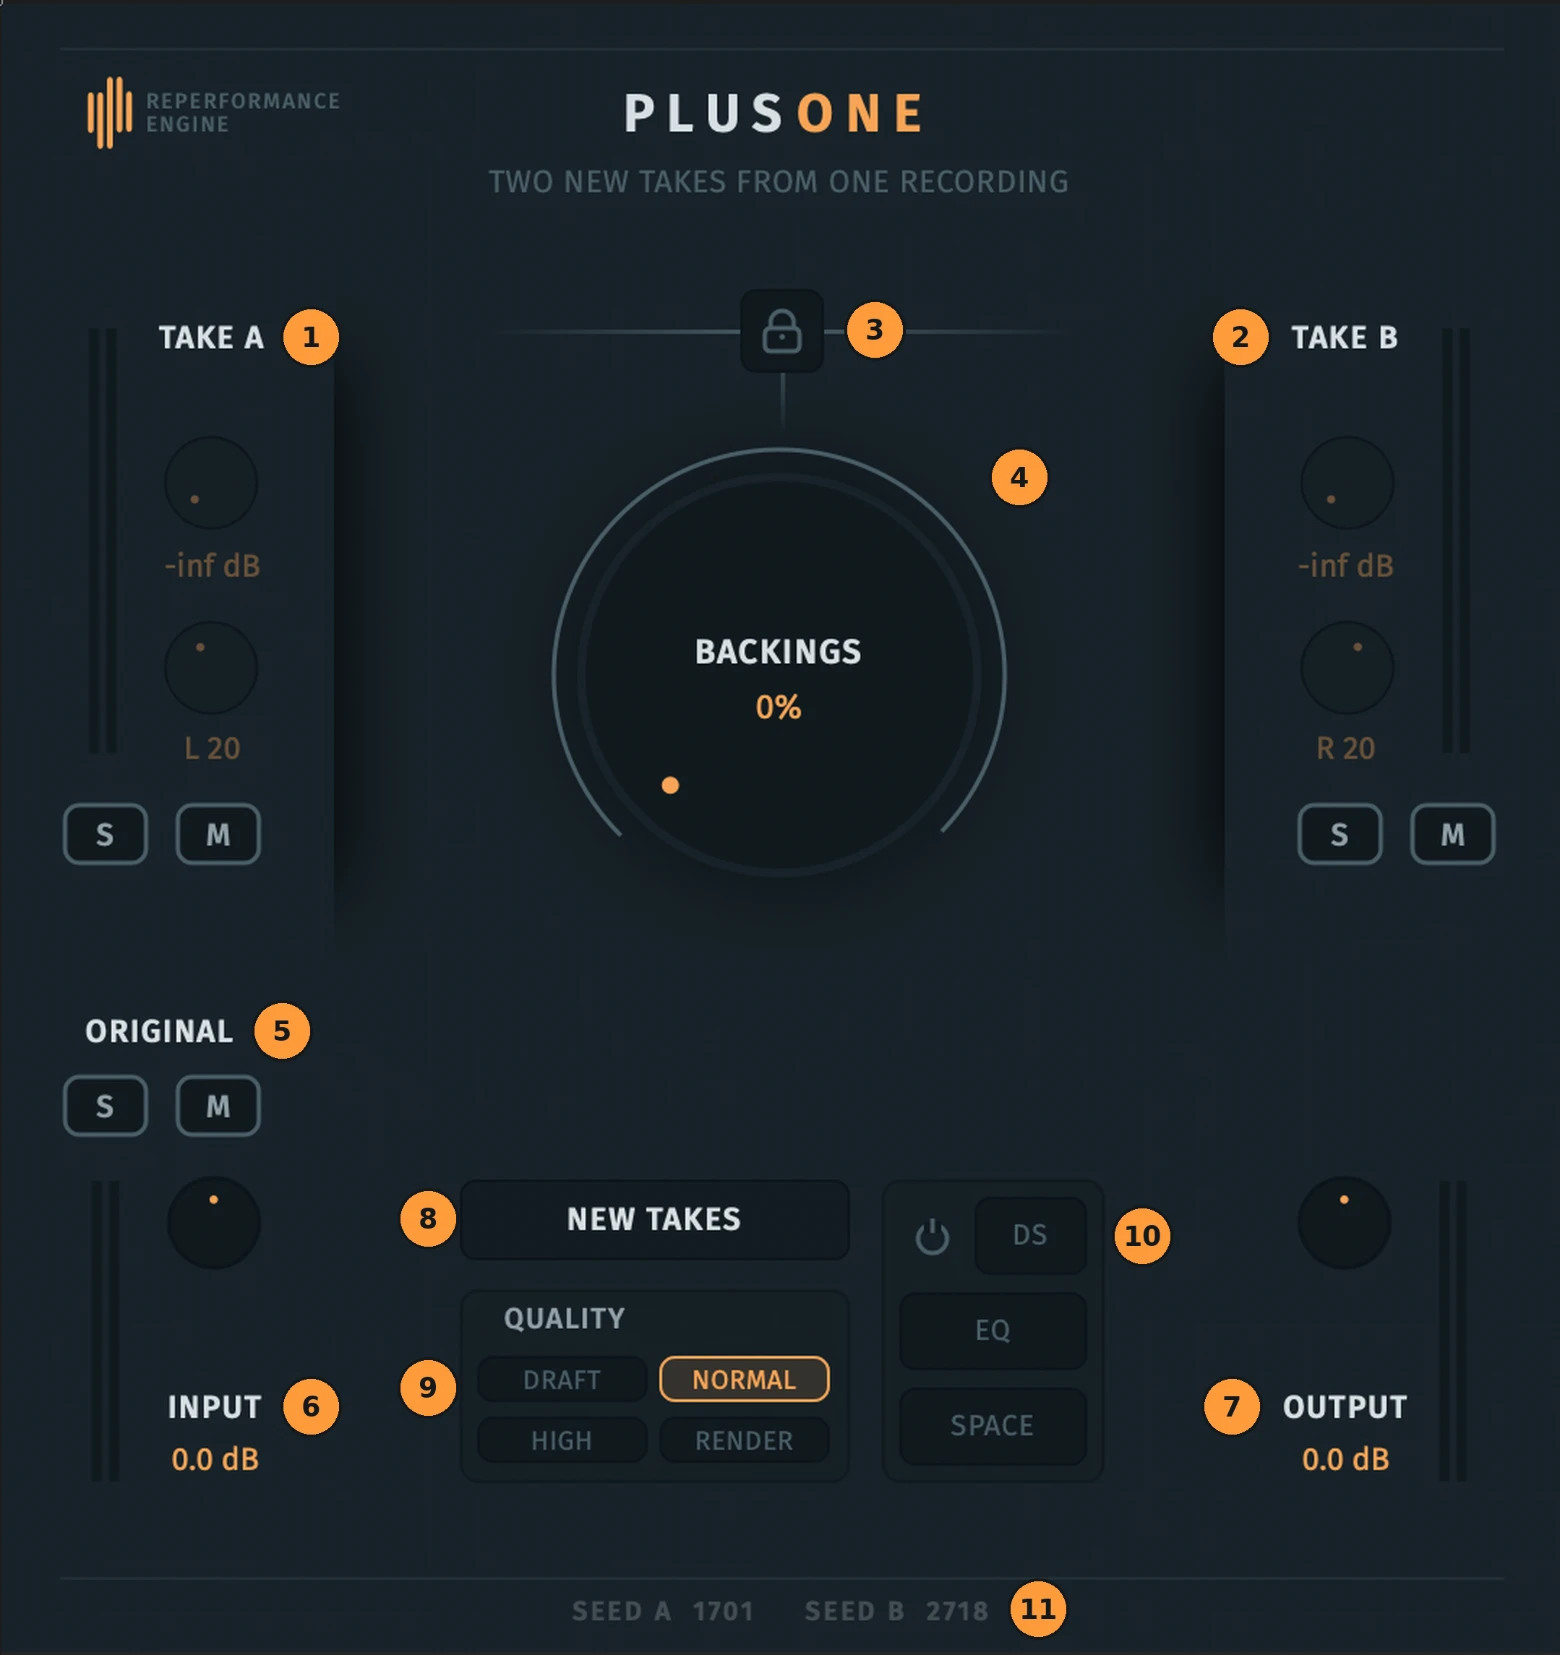
| # | Element | In one line |
|---|---|---|
| 1 | Take A | Level, pan, solo and mute for the first generated take |
| 2 | Take B | Level, pan, solo and mute for the second generated take |
| 3 | Lock | Switches between BACKINGS control and independent take control |
| 4 | BACKINGS | Sets level and stereo spread of both takes with one knob |
| 5 | Original | Solo or mute the source vocal |
| 6 | Input | Level into the engine |
| 7 | Output | Level of the whole stack |
| 8 | NEW TAKES | Generate a new pair of performances |
| 9 | Quality | Draft, Normal, High, Render |
| 10 | Backing FX | On/off plus preset De-esser, EQ and Space for the takes |
| 11 | Seeds | Identify the current take pair |
Controls reference
Numbers match the callouts on the interface overview.
1–2 · Take A and Take B
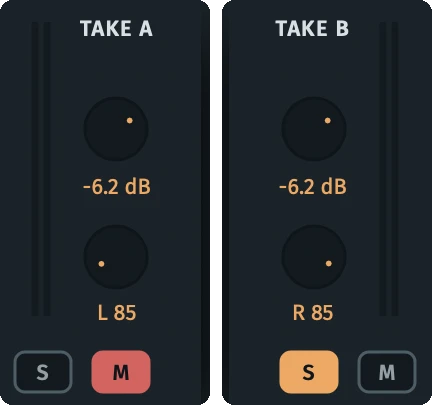
Each generated take has its own channel strip with a level meter.
| Control | What it does | Available |
|---|---|---|
| Level (upper knob) | Volume of this take in the mix. | Lock open |
| Pan (lower knob) | Stereo position of this take. | Lock open |
| S (Solo) | Hear only this take. Use it to judge a take on its own or to print it. | Always |
| M (Mute) | Silence this take. Use it to keep a single supporting take. | Always |
With the Lock closed (default), the Level and Pan knobs follow BACKINGS and show its current values. Solo and Mute always work.
3 · Lock

The Lock chooses who controls the takes’ level and pan.
- Closed (default): BACKINGS controls both takes together. The Take A and Take B knobs are inactive.
- Open (lit orange): BACKINGS is inactive, and you set level and pan for Take A and Take B independently. The take knobs start from exactly the values BACKINGS had set.
When you close the Lock again, both takes return to the level and pan set by the current BACKINGS position. Your manual settings are not kept, so note them before closing if you want them back.
4 · BACKINGS
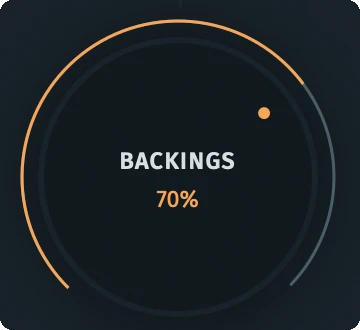
The main control. BACKINGS sets the level and the stereo spread of both takes at once, mirrored left and right. At 0% you hear only the original. As you turn it up, the takes get louder and move further apart. The right value depends on your material and the result you want. Around 30–50% makes the lead a little wider and fuller. Toward 100% you get a true multi-voice stack. Open the Lock if you need to set each take by hand.
Push the backings back with processing, not level. If the stack feels too prominent, use the Backing FX section or your own processing on the bus to place the takes behind the lead. Turning the takes down too far brings you back to a single voice and loses the multi-voice effect.
5 · Original
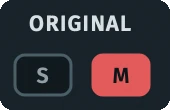
Solo (S) or mute (M) the source vocal. Mute it when you want only the generated takes, for example when PlusOne runs on a bus or when you print the takes to separate tracks.
6–7 · Input and Output
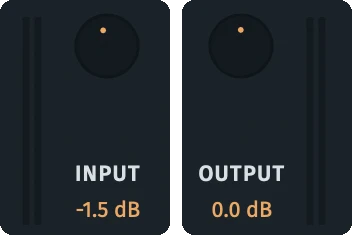
Input sets the level going into the RePerformance Engine; Output sets the level of the whole stack leaving the plugin. Both default to 0.0 dB and have meters. Lower the input by a few dB before raising BACKINGS: three voices at similar levels sum to a noticeably louder signal than the original alone, and the extra headroom keeps the output from clipping.
8 · NEW TAKES

Replaces the current pair with a new one generated from the same recording. The new takes are different waveforms with a different frequency response, but by ear the difference is usually subtle: NEW TAKES is not a way to look for a better sound. Use it when a take has a glitch or drifts too far from the lead in timing or pitch. It also lets you go beyond two backing voices: print the current pair to audio, press NEW TAKES and print again (see Print the takes to audio).
9 · Quality
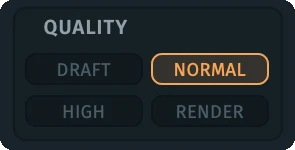
Sets the reconstruction quality and CPU load: Draft, Normal, High or Render. See Quality modes, CPU and latency.
10 · Backing FX
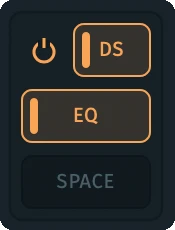
A preset processing chain for the generated takes only; the original is never processed. The three processors have fixed settings tuned for a finished sound out of the box. With all three on, the backings sit slightly behind the lead vocal.
| Control | What it does |
|---|---|
| Power | Turns the whole Backing FX section on or off. Turn it off when you process the takes with your own plugins. |
| DS | De-esser: softens sibilance, which builds up when several voices sing the same consonants. |
| EQ | Fixed tone shaping that helps the takes sit behind the lead. |
| SPACE | Fixed ambience that places the takes slightly farther back than the lead. |
11 · Seed A and Seed B

The numbers at the bottom identify the current take pair. They are display only and cannot be typed in. The pair is saved with your DAW project and recalled exactly when you reopen it.
Workflows
PlusOne was designed to run on a bus: your lead stays untouched on its own track, and the two takes arrive on a separate channel you can process freely. Inserting it directly on the vocal track is the quickest alternative.
Recommended: PlusOne on a bus
Best for most mixes. You keep full control of the lead and get the backings as their own channel.
- Create a stereo bus (aux / FX channel) and insert PlusOne on it.
- Send the lead vocal to that bus.
- In PlusOne, press M on Original. The bus now outputs only Take A and Take B.
- Raise BACKINGS to set the level and width of the takes.
- Process the bus as a backing-vocal group. If you use your own EQ, de-esser and reverb, switch the Backing FX section off.
- Balance the backings against the lead with the bus fader.
Quick: PlusOne on the vocal track
Best for demos, sketches and songwriting sessions.
- Insert PlusOne on the finished lead vocal (stereo track).
- Lower INPUT a few dB, then raise BACKINGS until the stack feels full but the lead still leads.
- Turn on DS, EQ and SPACE for a finished sound out of the box.
Shape the stack per section
Best when the verse and the chorus need different treatment.
- Automate BACKINGS. One knob moves level and width together, so a low value in the verse and a higher one in the chorus makes the stack grow with the song.
- Use one take for verses. Mute Take B for a subtle thickening, and unmute it for the chorus.
- Set takes by hand. Open the Lock to give each take its own level and pan, for example one take closer to the center and quieter than the other.
- Audition the takes in solo. Solo each take to check it holds up on its own; if one has a glitch, press NEW TAKES.
Advanced: print the takes to audio
Best for final mixes, when you want to edit each take like a recorded vocal.
- Switch Quality to RENDER.
- Solo Take A and render or freeze it to a new audio track. Repeat with Take B.
- Switch the Backing FX section off and process each take with your own chain.
- Edit the printed takes like any vocal: trim breaths, tighten endings, nudge phrases.
- Need more than two backing voices? Press NEW TAKES and print the new pair as well.
Build depth with other EVA tools. Put Virtual Stage FX on the backings bus to push the takes farther back, Nearizer FX on the lead to bring it closer, and Upsizer FX on the lead to give it more size and weight against the backings. The result is a stack with a clear front and back, not only left and right.
Quality modes, CPU and latency
Every mode runs in real time; the modes differ in reconstruction quality and CPU load. On a modern computer, High is a comfortable everyday setting. In a heavy session with many plugins, Normal keeps the CPU load down, and on an older or slower computer Draft is the safe choice.
| Mode | Reconstruction quality | CPU load | When to use it |
|---|---|---|---|
| Draft | Basic | Lowest | Older or slower computers |
| Normal | Good (default) | Moderate | Heavy sessions with many plugins |
| High | Higher | Higher | Everyday work on modern computers |
| Render | Highest | Highest | Bounces and final prints; light sessions on powerful computers |
Render is the most demanding mode. It plays in real time, but even on a fast computer it takes a noticeable share of the CPU. Switch to it before you bounce, or use it in light sessions and on powerful workstations, rather than leaving it on while you work.
Why PlusOne has 220 ms of latency
PlusOne always adds exactly 220 ms of latency, at every quality setting and sample rate. This is not a side effect of slow code; it is how the engine works.
A singer recording a double already knows the line: which note comes next, where a phrase ends, when the next word starts. To re-perform your vocal convincingly, PlusOne needs the same knowledge. The 220 ms window lets it look ahead in the performance, understand where each note and phrase is going, and only then rebuild Take A and Take B. Without that look-ahead, the takes would react to the vocal instead of singing along with it.
Your DAW compensates for the latency automatically when plugin delay compensation is on, so the takes stay in time with the session. Because of the look-ahead, PlusOne is a mixing tool and is not suited to live monitoring while recording.
Tips, troubleshooting and FAQ
Tips for the best results
- Feed it a clean, dry, single voice. PlusOne works best on a solo vocal without heavy reverb, delay or background noise. Add your time-based effects after it.
- Tune and comp first. The takes follow the source performance, so fix pitch and timing before PlusOne, not after.
- Keep the backings behind the lead. If the stack sounds crowded, place the takes farther back with DS, EQ and SPACE or your own bus processing, rather than turning them down until the stack thins out.
Troubleshooting
| Symptom | Likely cause | What to do |
|---|---|---|
| Takes sound out of sync with the session | Plugin delay compensation is off | Turn on delay compensation in your DAW |
| No takes audible | BACKINGS at 0%, takes muted, or (with the Lock open) take levels at −inf dB | Raise BACKINGS; check the M buttons and take levels |
| Output clips | Three voices sum louder than one | Lower INPUT a few dB |
| The stack has no width | PlusOne is on a mono track | Use a stereo track or a stereo bus |
| Session feels heavy, clicks or crackles | High CPU load | Switch to Draft or Normal, or raise your audio buffer size (1024 samples on slower computers) |
| Odd artifacts on some words | Reverb, noise or a second voice in the source | Use a drier, cleaner source; try another take pair |
| Harsh “s” sounds | Sibilance builds up across three voices | Turn on DS, or de-ess the takes on their own channel |
FAQ
Does PlusOne use AI or the cloud?
No. The RePerformance Engine is DSP that runs entirely inside the plugin. Nothing is uploaded and no voice model is involved.
Can it create harmonies?
No. The takes sing the same notes as the lead. PlusOne builds unison doubles.
Will my takes change when I reopen the project?
No. The take pair is saved with the project and recalled exactly.
Does it work on instruments?
PlusOne was developed for vocals, but nothing stops you experimenting. The engine handles other sources without breaking, and solo instruments such as flute, violin or sometimes guitar can give interesting results.
Can I use it live?
Its latency makes it a mixing tool, not a live or tracking effect.
Need help?
Contact EVA support through the Support page or by email at support@evainstruments.com.