
About Power Riffer
Power Riffer is an electric rhythm guitar library for Kontakt, built on real recorded power chords. You select a chord and strike the strings, and the script changes chords with slides, pull-offs and hammer-ons, as a real guitarist would.
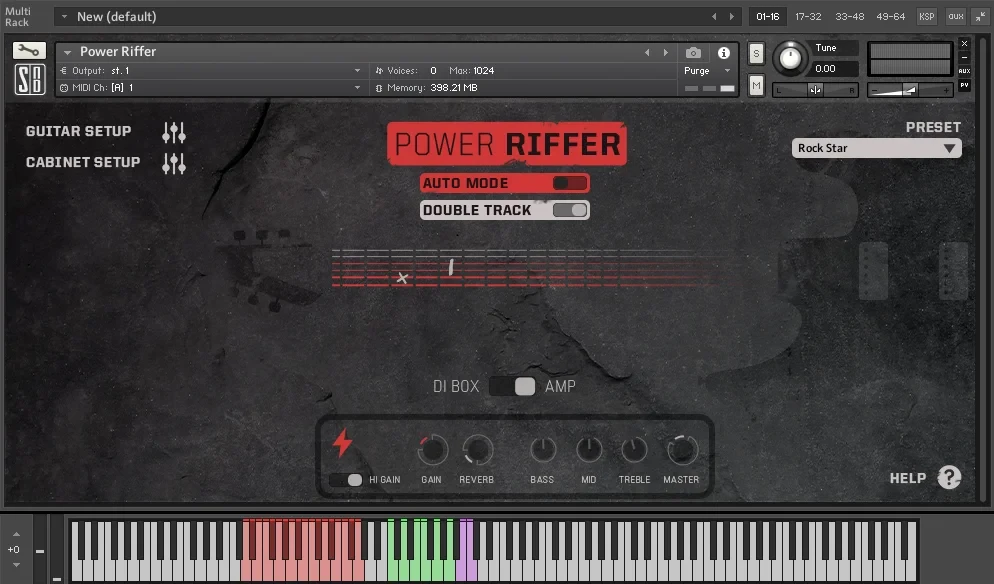
Play it through the built-in amplifier and cabinet, or take the clean DI signal into your own amp plugin. Double track mode gives you two guitars, left and right, for a dense and wide sound.
Installation and system requirements
Power Riffer was created for the full version of Kontakt 6.4.2 or later and does not work in the free Kontakt Player.
System requirements
| Product type | Sample library for Kontakt |
|---|---|
| Kontakt | Full version of Kontakt 6.4.2 or later. Not compatible with the free Kontakt Player. |
| Download size | 4.39 GB |
| CPU | Intel Core i3 or equivalent minimum; Intel Core i5 or equivalent recommended for real-time playing |
| Memory | 4 GB RAM or more recommended |
| Storage | SSD recommended |
Install the library
- Download the .zip archive from My Account → My Downloads on evainstruments.com.
- Unzip it. Inside is the library folder with all the files it needs. Move this folder to any convenient place on your hard disk, preferably an SSD.
- Load the Power Riffer.nki file from the library folder into Kontakt, as described below for your Kontakt version.
- Kontakt 6: drag and drop the Power Riffer.nki file from the library folder into the Kontakt workspace. You can also use the Files tab in the Kontakt browser or the Quick-Load function.
- Kontakt 7 and 8: drag and drop the Power Riffer.nki file into Kontakt, or open it from the Kontakt file menu.
Power Riffer is not a Kontakt Player library, so it does not need activation in Native Access and does not appear in the Kontakt Libraries list. Open it from its folder as described above.
Batch re-save for faster loading. We strongly recommend a batch re-save of the library in Kontakt: the library will load faster afterwards. Keep in mind that after a batch re-save, the library cannot be opened in Kontakt versions earlier than the one you re-saved it in.
Quick Start
The library script works like playing a real guitar: first you get ready to play a chord, then you touch the strings to make the sound.
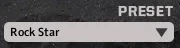
- Select a preset in the PRESET menu in the upper-right corner of the interface.
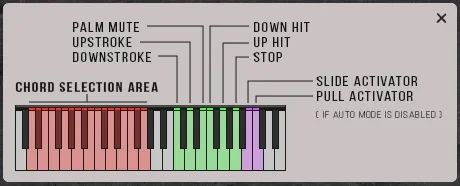
- Select a chord with the keys from D0 to G1, highlighted in red on the Kontakt keyboard.
- Strike the strings with the keys from C2 to A2, highlighted in green on the Kontakt keyboard.
To see what each key does, use the help built into the interface: click HELP in the lower-right corner.
Basic controls
AUTO MODE and DOUBLE TRACK
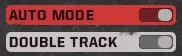
The AUTO MODE switch chooses between the manual and automatic playing modes. It sets how the chord change techniques are triggered: slide up, slide down, pull-off and hammer-on. Both modes are described in Automatic and manual playing modes.
The DOUBLE TRACK switch turns on a mode in which you hear two guitars at the same time. See Double track mode.
PRESET menu
A set of 10 ready-made presets. Use them as a starting point to find the settings that suit your current task.
GUITAR SETUP and CABINET SETUP
The GUITAR SETUP button opens the guitar settings window, with switches and sliders for the guitar volume, pickup selection, noise volume and more. The window looks different and has a different set of controls when double track mode is on or off.
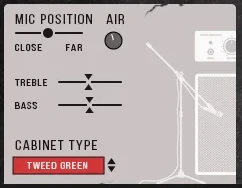
The CABINET SETUP button opens the cabinet settings window, with controls for the microphone position, cabinet type, equalization and more. The cabinet settings affect the sound only when the DI BOX / AMP switch is set to AMP.
DI BOX / AMP switch
Selects the audio source: a guitar amp, or the clean guitar recorded through a DI box. See Audio source switch.
Amplifier
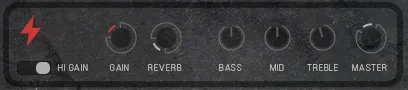
The amplifier block sets the amp level, gain, equalization and reverb: HI GAIN, GAIN, REVERB, BASS, MID, TREBLE and MASTER. The amplifier settings affect the sound only when the DI BOX / AMP switch is set to AMP.
Automatic and manual playing modes
The library has two main playing modes, automatic and manual. Switch between them with AUTO MODE.
Automatic mode
In automatic mode, the script itself chooses which technique to use when you change a chord (slide up, slide down, pull-off or hammer-on), as a real guitarist would. The choice depends on the chord sequence, the distance between the chords and the strings the chords are played on.
To trigger a technique, do the same as on a real guitar:
- Select the first chord.
- Without releasing the key of the first chord, strike the strings up or down (keys C2 and D2).
- While still holding the key of the first chord, press the key of the next chord. The velocity of the second chord key sets the speed of the slide.
If you don’t want any technique when changing a chord, release the key of the previous chord before you select the next one.
Automatic is the recommended mode. In it, your guitar sounds as natural as possible.
Manual mode
In manual mode, you choose how the chord changes. When manual mode is on, two more keys become active on the keyboard:
- B2 activates a slide up or slide down.
- C3 activates a pull-off or hammer-on.
The sequence is the same as in automatic mode, except that after selecting the first chord you press B2 or C3 to choose the technique. If you press neither key, the chord simply changes.
When you change between two chords that both start on the fifth string, pull-off and hammer-on are not possible, even if you press C3.
Double track mode
Double track mode sends two different takes of the same guitar part to the left and right channels at the same time. This is one of the most common recording techniques for a denser and wider electric guitar sound.
When the mode is on, the GUITAR SETUP window changes and shows more controls.
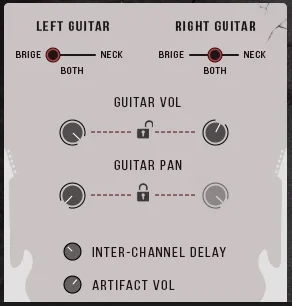
For each guitar, LEFT GUITAR and RIGHT GUITAR, you can now select the pickup position (bridge, both or neck), and set the volume (GUITAR VOL) and the panning (GUITAR PAN) individually.
The lock switches between the volume and pan controls copy the settings of the first guitar to the second. This is especially convenient when you adjust the panning.
Audio source switch
The DI BOX / AMP switch selects the guitar sound source.
In the DI BOX position, the library plays the clean guitar sound, recorded in line through a DI box. Use it together with the amp and cabinet simulator plugin you usually work with. This opens up many ways to find the right electric guitar sound for your track, and lets you use the amp plugins whose sound you already know. In this position the built-in amplifier and cabinet are off, and changing their settings has no effect on the sound.
In the AMP position, the built-in guitar amplifier and cabinet are on. Change the amp settings in the amplifier block, just like on a real guitar amp. In the CABINET SETUP window you can also adjust the cabinet: set the microphone position and choose the one of the two cabinet models whose sound you prefer.
Adjusting the noise level
In the GUITAR SETUP window, you can adjust the volume of the natural noises that occur when recording a guitar: sliding along the strings, pressing the strings, releasing a chord, the after-sound when the right hand stops the strings, and so on.
All these noises are an integral part of the guitar sound, but sometimes you may want a cleaner, more mechanical guitar part.
A few last tips
- Reset a control. Ctrl-click (Cmd-click on macOS) any control to set it to its default value.
- Fine adjustment. Hold Shift while you move a control to adjust it more precisely.
- Don’t pan too wide. In double track mode, we do not recommend panning the guitars all the way to the sides: guitars that sound too wide are not always appropriate. About 70% is usually enough.
- Drop D tuning. The guitar we recorded has the 6th string tuned to D. Thanks to this, you can use pull-offs and hammer-ons when changing the lower chords. Feel free to use them as often as you like: it really sounds good.
- Chord position indicators. The indicators on the strings show which chord is currently held. If there are no indicators, you hear the open strings: a D5 chord.
- Guitar volume. The guitar volume control in the GUITAR SETUP window works the same way as on a real guitar. The default value is the maximum, and turning it down reduces the sensitivity of the pickups.
- External amp simulators. Not all amp simulator plugins process a stereo signal correctly. If yours does not, turn double track mode off.

Need help? If you have any questions or difficulties with the library, don’t hesitate to write to us. Contact EVA support through the Support page or by email at support@evainstruments.com.