
Practical Mixing Guide
Depth, Closeness and Perceived Size in a Mix
Depth, closeness and perceived size are related, but they are not the same thing, and most mix problems in this area come from solving one of them with the wrong parameter. This guide separates the three, explains what each one actually means at the console, and shows what to reach for in each case — including the cases where the right answer is a plugin you already own.
Three different mix dimensions
Closer ≠ just louder
A distant recording can be loud and still feel distant. Proximity is not simply a fader move.
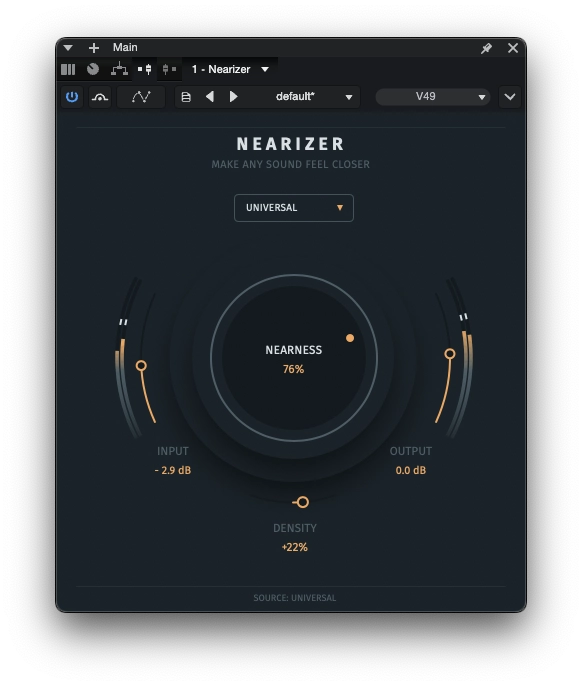
Nearizer FX
Perceived closeness
Bigger ≠ wider
Stereo width affects spread. A sound can become wider without feeling physically larger.
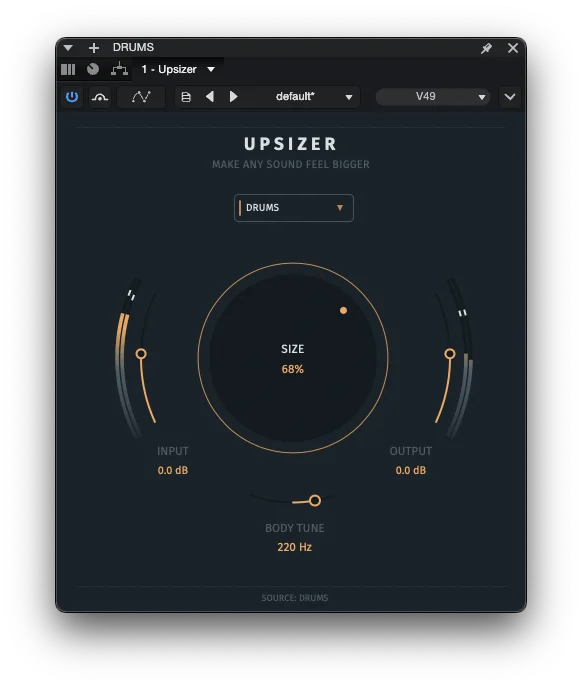
Upsizer FX
Perceived source size
Farther back ≠ quieter
Lower level can help a source sit back, but distance is also shaped by spatial and tonal cues.
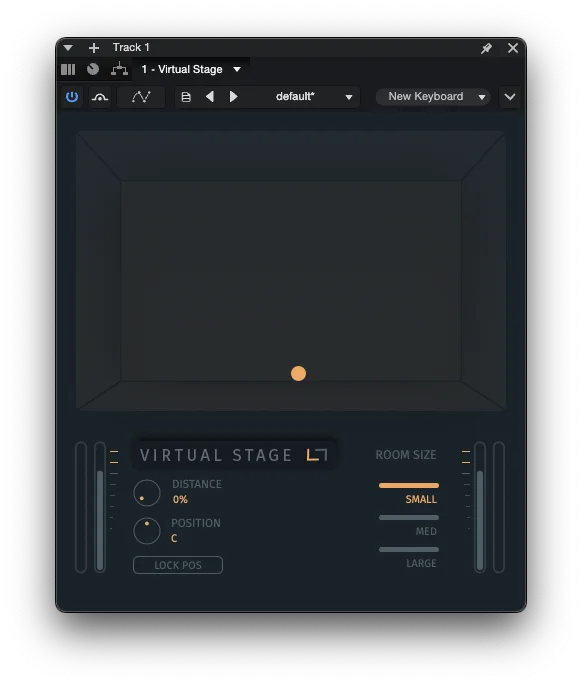
Virtual Stage FX
Depth and spatial placement
When a sound needs to come forward
Closeness is how near a source feels to the listener. Raising a fader makes it louder, but a recording made at a distance usually still sounds distant at any level.
Loudness and proximity are different cues
A close source reaches you mostly as direct sound. A distant one arrives as direct sound plus a large amount of reflected energy, with less high-frequency detail and softer transients. Level is only one part of that picture, and it is the only part a fader can change.
That is why turning up a roomy recording tends to make the room louder along with the source. The balance between direct and reflected energy stays where it was, so the source stays where it was.
These are tendencies, not fixed rules. Microphone choice and the original recording distance matter more than any processor you add afterwards. Harmonic density is deliberately missing from the list: a source can be close and light or close and heavy, so weight is a separate decision rather than a proximity cue.
Bring it forward by hand
Level is assumed to be set. What follows are the cues that decide whether a loud source actually reads as near, and they are worked in roughly the order of how much each one contributes.
Every value below is a starting point of the right order of magnitude, not a setting. The useful numbers depend on the instrument, the recording distance, the microphone and the arrangement, and they are found by ear. Studio One devices are named for reference; every major DAW has direct equivalents.
Shift the direct-to-reflected balance
This is the strongest proximity cue and it is worth doing first, because everything after it is partly compensation for what you cannot fix here. If the source feeds a room or plate send, lower that send before touching the source itself.
Ambience recorded into the file is a harder case, because the ratio is fixed and no send balancing reaches it. On material with gaps between phrases you can still reduce how much of the room is audible: a downward expander set to 2–4 dB of expansion, fast attack and a release around 100–200 ms, will pull the decay down between notes without touching the notes themselves. On sustained parts there are no gaps to work with and this does nothing. If the room is the actual problem, the last method in this chapter is the honest answer.
Recover the attack
Reflections arriving within the first milliseconds smear the onset of a distant source, so a clearly defined attack is one of the most reliable signals of proximity. What matters is not the absolute level of the transient but its ratio to the body behind it.
That ratio is why the compressor here is set the opposite way to the one used for pushing a source back. Use an attack of 10–30 ms so the front edge passes through before gain reduction begins, ratio 2:1 to 4:1, and 2–4 dB of reduction on the body, with release around 60–150 ms. The transient survives untouched while the body comes down, which raises the attack-to-body ratio without raising the peak. A transient shaper with a modest attack increase reaches the same place more directly.
On pads and sustained strings there is little onset to recover, and this step contributes almost nothing.
Restore the spectral cues of a close source
Distance removes high-frequency detail and flattens the sense of a focused, present spectrum. Putting some of that back is straightforward: a high shelf from around 6–10 kHz at +1 to +3 dB, and if the source still sounds veiled, +1 to +2 dB across the 2–5 kHz presence region at a wide Q of about 0.7–1.0.
Directional microphones also gain low end as they approach a source, and the ear reads that added weight as proximity. A broad +1 to +2 dB somewhere between 150 Hz and 400 Hz can suggest it, but this range congests quickly in a full arrangement and too much of it reads as muddy rather than near.
On its own, none of this will move the source. An EQ curve applied without the corresponding changes to transient, spatial and dynamic behaviour is heard as a tone change, not a change of distance — the source becomes brighter and stays exactly where it was. This is the single most common reason a hand-built proximity chain disappoints, and it is why the steps around this one matter more than the equaliser does.
Reduce the diffuse Side energy
In a recording made at a distance, a large part of what sits in the Side signal is decorrelated room energy, while the coherent direct sound sits mostly in the Mid. Lowering Side therefore raises the direct-to-reflected ratio, and the source moves forward. As a starting point, −1.5 to −4 dB on the Side signal alone, leaving Mid untouched. Do not go to mono: the aim is to reduce the room’s share of the image, not to discard the recording’s character.
In Studio One this is a Splitter in Mid/Side mode with a gain stage on the Side path, or Mixtool with its MS Transform. Solo the Side path before deciding how much to take: it tells you what you are actually removing.
This is the one move in this guide that produces opposite results depending on the material, so it is worth understanding rather than memorising. Reducing Side pulls a roomy recording forward, because its Side content is mostly ambience. Reducing Side on a dry, close-miked stereo recording pushes it back instead, because there the Side content is direct sound and narrowing it makes the source subtend a smaller angle, the way a more distant object does. Same gesture, different contents, opposite outcome. If the soloed Side sounds like the instrument, you are narrowing a source; if it sounds like a wash, you are removing a room.
Stabilise the dynamics
A distant recording tends to feel soft and slightly unstable in level, and a source that drifts is a source that will not hold its position in front of the listener. This is a second, separate compressor stage from step 02, aimed at consistency rather than at transients: ratio around 2:1, attack 20–40 ms, release 150–300 ms, and a steady 2–3 dB of reduction rather than the intermittent peaks of the earlier stage.
This step is also where proximity most easily degrades into loudness. Compensate the make-up gain downward and compare against the bypassed version at matched level every time you change something.
Add density — and keep it separate from nearness
A close source usually feels solid and continuous rather than thin. Parallel compression is the straightforward route: send to a bus, compress hard at 4:1 or above with a fast attack and 6–10 dB of gain reduction, then blend it back underneath the original at roughly 10–25%. Gentle saturation on that bus adds harmonic weight to the same effect.
Treat this as its own decision rather than as part of the previous steps. Closeness and thickness are different properties: a source can be right in front of the listener and still light and open, and confusing the two is how a mix ends up heavy in the middle. Decide how near it should be, then decide separately how solid.
Level-match and recheck
Match the processed and bypassed versions in level before judging them, then compare in the full mix. At matched level the processed version should read as nearer — not brighter, harder or denser.
Check in mono as well. Step 04 changes the stereo balance, and a proximity move that only exists on a wide system is not much use on the devices most listeners actually own.
Each of these moves is unremarkable on its own. The difficulty is that they have to agree. The ear reads proximity from several cues at once, and it treats a single cue moved in isolation as an effect rather than as a change of distance. A brighter source with a smeared attack still sounds distant and now also sounds brighter. What is more, the right proportion between the cues is not fixed: a kick drum needs most of the movement in the attack, a sustained pad needs almost none of it there, and a full mix tolerates far less of everything. That re-tuning, source by source, is the real cost of building proximity by hand.
Move one control instead of six
Nearizer FX was built for exactly the problem described above. Its main control, Nearness, moves the same set of cues together — attack and directness, the direct-to-room balance, spectral focus, the spatial distribution of the signal, dynamics and harmonic weight — along curves tuned to keep them in proportion.
It is not a wet/dry blend. At zero the processing is effectively out of the path; raising it does not fade in one effect but advances several coordinated changes at once, which is why the result is stronger than the same components assembled separately. Source-specific profiles decide how much each mechanism should contribute for the material at hand, since the balance that works on a drum kit is wrong on a sustained pad. You choose the profile yourself rather than relying on automatic detection.
Density is deliberately a second, independent control, for the reason given in step 06 above: closeness and thickness are not the same property, and collapsing them into one knob makes both harder to set.
Virtual Stage FX, covered later in this guide, does the opposite job: it decides where a source sits on a stage, including farther back. Nearizer is the tool for pulling one forward.
Nearizer FX is not a volume plugin, and it is not a de-reverb plugin. It keeps the ambience of the recording and changes how near the source feels inside it. The room can stay audible; it simply stops being the thing that decides where the source is. If that ambience is itself the problem, the next method is the honest answer.
Maybe what you actually need is de-reverb
Sometimes the recording is not merely distant. It has an unwanted room printed into it: a vocal tracked in a live corridor, a location recording, a stem that arrived without a dry version. There the goal is not to shift perceived proximity but to reduce the room itself.
That is restoration work and it needs restoration tools. They analyse the signal and attempt to separate direct sound from reflected sound, which is a harder and more destructive operation than shaping proximity. Expect to trade some artefacts for the room you remove, and to end up using less of the effect than you first reach for.
The established options I would look at are Acon Digital DeVerberate , Waves Clarity Vx DeReverb and Zynaptiq UNVEIL . They work by different means and behave differently on different material, so a trial on your own problem file is worth more than any comparison chart.
When a sound needs to feel physically larger
Size is how large the source itself seems, independently of where it sits or how near it feels. Widening the stereo image spreads a sound across the speakers, which is not the same as making the thing producing it bigger.
We read size from the physics of the source
Large objects behave differently from small ones. They resonate lower, take longer to start moving, ring for longer and produce a more complex set of overlapping modes. We learn those relationships from everyday listening, and we apply them to recordings without thinking about it.
That is why a small drum stays a small drum when you make it louder or wider. Neither move touches the cues we actually use to judge scale.
Stereo width is deliberately missing from this list. Width changes where a sound sits across the image, not how large the source producing it appears to be.
Build the scale by hand
The approach that works is not to process the source into something larger. It is to leave the original alone as the centre of the image and build a supporting layer beside it that differs from it slightly in several ways at once — in timing, in pitch, in spectrum, in dynamics and in position.
The reason this works is that several slightly different realisations of one sound are heard as a larger event than one perfectly coincident waveform. A struck drum head, a cabinet, a choir: none of them produce a single clean vibration, and the ear uses that internal complexity to estimate physical scale. A duplicated track that is an exact copy adds level and nothing else.
Values below are starting points of the right order of magnitude. The workable ranges here are narrower than elsewhere in this guide and depend heavily on the material, so expect to find the numbers by ear. Studio One devices are named for reference; every major DAW has direct equivalents.
Decide what bigger means for this source
Bigger is an overloaded word. It can mean more weight, longer sustain, more harmonic body, more space occupied across the image, or simply louder. Those are different problems with different solutions, and pursuing all of them at once is how a mix ends up crowded.
Play the part in the full mix and finish the sentence: this should sound like a larger version of the same thing, specifically because it has more of what. The answer decides which of the steps below carry the work and which you skip.
Duplicate the source and protect the original
Send the channel to a parallel bus, or duplicate the track. From this point the original receives no processing at all and stays exactly where it was in the image. It is what tells the listener what the instrument is: it holds the attack, the intelligibility, the localisation and the phantom centre.
Everything that follows happens on the supporting layer only. This is the discipline that separates the technique from a chorus or a widener — the moment the processed version starts replacing the original rather than surrounding it, the source loses definition instead of gaining size.
Diverge the support in time and pitch
Delay the supporting layer relative to the original. The usable window is narrow and sits roughly between 8 and 20 ms: below about 5 ms the two signals comb-filter and you hear a change of tone rather than of scale, and above roughly 25–30 ms the support detaches into an audible second hit. Percussive material wants the low end of that range, sustained material tolerates the high end.
Then detune the support slightly — on the order of 3–10 cents, held steady rather than modulated. A cyclic LFO is what turns this into a recognisable chorus, which is a different and much more obvious effect. If you use two supporting layers, detune them in opposite directions so the centre of pitch stays where it was.
A third divergence, in formant character, is what makes a supporting layer read as a physically larger body rather than as a copy. It is also the one step stock tools handle poorly: most DAW pitch shifters move formants together with pitch, which changes the identity of the source instead of its apparent size. If your pitch-shifting tool exposes formants separately, a small downward move on the support alone is worth trying. If it does not, skip it rather than forcing it — an audible formant shift sounds like a different instrument, not a bigger one.
Shape the support’s spectrum
A supporting layer that reinforces the whole spectrum equally just makes the source louder and starts masking the original’s definition. The support should contribute mass, not detail.
In practice that means rolling the top off the support — a high cut somewhere around 6–8 kHz on most material — so that all the articulation and air the listener hears comes from the untouched original. Where the support is allowed to add weight depends entirely on the source, which is the subject of step 07.
Give the support a different envelope
If the support follows the original’s dynamics exactly, the two attacks stack, peaks rise, and the result is a parallel copy that reads as louder. The division of labour that works is the original carrying the attack and articulation while the support carries sustain and body.
Compress the support harder than you would the source — ratio around 4:1 with a slower attack of 30–50 ms and 4–8 dB of gain reduction — so its transient is held back while its tail is brought up. On transient-heavy material this is the difference between a louder hit and a larger one.
Place the support around the centre
With two supporting layers, pan them out to roughly 40–70% left and right while the original stays dead centre. With one, widen it and keep it clearly behind the original in level. The image that results is a defined source in the middle with additional mass around it, rather than a hole in the centre with material at the edges.
Check in mono. Layers that reinforce each other on a wide system can partially cancel when summed, and a size trick that vanishes on a phone speaker is not a size trick. Width contributes to the impression of scale, but it is one cue among several, and pushing it alone produces a wide source rather than a large one.
Find where the added weight belongs
The region where extra body reads as size rather than as mud is different for every kind of source, and it moves a long way: a bass guitar, a male voice, a female voice, a piano and a snare do not share a useful body region. There is no general frequency to recommend here, and any article that gives you one is guessing.
Find it by sweeping a moderate bell boost, roughly +3 to +4 dB at a Q around 1.0, through the lower half of the support’s range until the source gains weight without the mix losing clarity, then reduce the boost to +1 to +2 dB and leave it there. Do this in the full mix: the region that sounds impressive in solo is usually the one that collides with something else.
On a full mix rather than a single instrument, be far more conservative. Added low-mid mass in the wrong place will not read as scale at all — it produces mud, fights the kick and bass, and changes the tonal balance of the record.
Level-match and recheck
Almost every step here adds energy, and louder reliably sounds better for the first few seconds. Match the processed and bypassed versions in level before judging them, otherwise you are only confirming that gain works.
At matched level the result should sound like a larger instance of the same instrument — not a louder, duller, wider or busier one. If you can hear the support as a separate event, reduce its level or shorten its delay until it merges back into the source.
Several of these cues pull against the other two axes in this guide. A slower support envelope and a longer resonant tail suggest size but soften the immediacy that makes a source feel close, and anything that adds decorrelated energy around a source also nudges it backwards. Depth, closeness and size are independent properties, which means moving one will sometimes cost you another. That is normal, and it is a reason to decide which of the three actually matters for the part before processing anything.
One control for the whole set of cues
Upsizer FX is built on the structure described above. The original stays at the centre as the anchor, shaped supporting material is created around it, and one control, SIZE, advances all of the divergences together — timing, pitch, formant character, spectral body, dynamic contour and spatial spread — in proportions that hold up as you turn it.
A second control decides where the added mass sits. BODY TUNE focuses the extra weight in the region that suits the source, which is the manual step that has no general answer. In the Full Mix profile the same control becomes MIX ROOT and works differently: on a finished mix, body added at an arbitrary frequency produces mud and conflicts with the low end, so it is tied to the musical root of the track instead. Source-specific profiles set how much each mechanism contributes, since distorted guitar chords already carry enormous harmonic density while a clean solo line does not.
It is worth being exact about what this does, because bigger is such a loose word. Upsizer changes how large the source itself seems. It is not a loudness processor, not a saturation plugin, not a doubler and not a stereo widener, although each of those can produce a superficially similar first impression. A louder small source is still small; a wide source is not necessarily large.
It also does not move anything forward or backward. Placement is what Virtual Stage FX does, proximity is what Nearizer FX does, and size is a third independent axis. That separation is the reason these exist as three tools rather than one general enhance control.
Maybe what you actually need is width
If the real complaint is that a source feels narrow or stuck in the centre rather than small, then the tool you want is a stereo widener, and it is doing something genuinely different. Widening spreads the image across the speakers. It changes where the sound is, not how large the thing producing it seems. A very wide sound can still be small, and a mono sound can be enormous.
Most DAWs include a stereo-width or Mid/Side utility that will do this, and Polyverse Wider is free, widely used and specifically designed to stay mono-compatible, which is where casual widening usually goes wrong.
There is a third possibility worth naming honestly: sometimes the part does not need to be larger at all, it needs to be denser or simply louder in the balance. That is a different family of processing again.
For that kind of density and loudness work, Sonnox Oxford Inflator , Waves Scheps Parallel Particles and Zynaptiq INTENSITY are established choices. They are solving loudness and density, not scale — which is exactly why they are the right answer when scale was never the problem.
When a sound needs to sit farther back
Depth is the front-to-back position of a sound in the mix. Turning a fader down changes level, but it does not automatically make the source feel farther away.
Distance is a combination of cues
Our perception of distance comes from several things changing together. A farther source may be quieter, but we also tend to hear a different balance between direct sound and reflections, less high-frequency detail, softer transient definition and a different apparent spatial image.
That is why simply lowering the volume often produces a quiet sound that still feels close. Adding lots of reverb can fail in the opposite direction: the source becomes wetter, but not necessarily better placed.
These are useful tendencies, not fixed acoustic rules. The source, room and mix context still matter.
Build the placement manually
Convincing front-to-back placement can be built with the processors already in your DAW. Level is assumed to be set: it is the obvious distance cue and the one you have already used, and everything below is about the cues that decide whether a quiet source actually reads as distant.
Every value here is a starting point, chosen to be roughly the right order of magnitude rather than the right answer. Real settings depend on the instrument, the recording, the arrangement and how far back the source needs to sit, and they are found by ear. The Studio One devices named below have direct equivalents in every major DAW.
Reduce high-frequency detail
Air absorbs high frequencies progressively with distance, and reflective surfaces remove more of them at every bounce. The effect is real but modest: across ten metres of air the loss at 10 kHz is on the order of a couple of decibels, not tens of decibels. That is why the correct move here is a small one, and why a steep high cut usually reads as a blanket over the speaker rather than as distance.
Start with a high shelf, corner around 8 kHz, gentle slope, −1.5 to −3 dB. For a source that should sit clearly at the back of a room, move the corner down toward 5–6 kHz and go to −4 to −6 dB. In Studio One this is the top band of Pro EQ switched to shelf mode; leave the dedicated high-cut filter alone, since its slope is far steeper than this job needs.
If the source is still too present after that, try a broad cut of −1 to −3 dB somewhere in the 2–5 kHz presence region at a wide Q, around 0.7–1.0. The useful centre frequency here is strongly instrument-dependent and has to be found by ear. There is no universal distance EQ curve.
If the result turns thin, a broad lift of about +1 dB between 400 Hz and 1 kHz can restore body. Treat this as a repair for a problem you created, not as a step in its own right, and do not boost the low mids simply because a source is meant to sound far away.
Soften the transient
Reflections arriving in the first milliseconds after the direct sound blur the attack of a distant source. Sharp onsets therefore read as close, which is why drums, percussion, picked guitars and slap bass resist being pushed back even at low level.
With a compressor, the attack must be fast enough to actually catch the front edge: start at 1–5 ms, ratio 2:1 to 4:1, and aim for only 1–3 dB of gain reduction on peaks. Release in the region of 80–200 ms suits most percussive material; too short and the level pumps back up inside the note, which undoes the effect. A transient shaper reaching the same 1–3 dB of attack reduction is the more surgical route where one is available.
Skip this step entirely on pads, sustained strings and other sources with no meaningful attack. There is nothing there to soften, and the compressor will only alter the body.
Reduce the Side signal, not the stereo width
This distinction matters. Most width controls narrow a source by blending it toward mono, which alters the Mid content as well and tends to make the source sound filtered. What you want for depth is the Mid signal left exactly as it is and the Side signal reduced in level only.
In Studio One, insert Mixtool and use its MS Transform to encode, or place a Splitter in Mid/Side mode and put a gain stage on the Side path alone. Either way the Mid path stays untouched and receives no processing at all.
As a starting point, −1.5 to −3 dB on the Side signal is a subtle move and −4 to −6 dB is a clear step backwards. Past roughly −8 dB you are approaching mono, and the recording starts losing the character that made it worth keeping in stereo. Check the result in mono afterwards: Side reduction is one of the few depth moves that behaves differently on a summed system.
If the source is mono, leave it mono. There is no reason to manufacture a stereo image in order to narrow it again.
Build the early reflections
Early reflections are the first discrete arrivals from surfaces around the source, typically landing within the first 5–40 ms. They carry most of the information about where something is. The late tail describes how large the room is, which is a different question, and it is the part that gives away an obvious reverb.
Set up an aux send with a short room and keep the return fully wet. In Studio One, Open AIR lets you weight its early-reflection component against the late one directly, which is the control that matters here; Room Reverb reaches a similar place with the decay held short, around 0.4–0.8 s.
Filter the return, not the source: a high cut somewhere around 6–10 kHz, because each reflection loses top end at every surface, and a high pass around 150–300 Hz to keep the low end of the mix clear. Raise the send until the source stops sounding detached from a space, then stop. If you can identify the reverb as an effect, it is already louder than this technique wants.
Time the reflections, and make them asymmetric
The gap between the direct sound and the first reflection is the strongest single distance cue available, and it works in the opposite direction to most people’s intuition. Stand close to a source in a room and the direct sound arrives well before anything reflected, leaving a wide gap of perhaps 20–40 ms. Move away and that gap closes, because the direct path lengthens while the reflected paths barely change.
So a source that should sit farther back needs a short pre-delay, in the region of 0–10 ms. This is worth stating plainly, because the common advice to raise pre-delay in order to keep a source clear does the reverse: separating the direct sound from its reflections pulls the source forward.
Position across the stereo field is the same mechanism applied left to right. A source sitting right of centre is nearer the right-hand surfaces, so its right-channel reflections arrive sooner and louder while the left-channel ones arrive later and quieter. As a starting point for a source panned moderately right in a medium room, place the first right-channel reflection around 8–12 ms and the first left-channel reflection around 18–25 ms, with the left arrivals 2–4 dB lower and slightly darker.
A stock reverb will not give you that asymmetry, because it is built to produce a plausible room rather than a specific seat in one. A multi-tap delay will: in Studio One, Groove Delay gives each repeat its own time, pan position and filtering. Three to five taps with no feedback, each timed and panned by hand and each darker than the last, is enough to build a usable reflection pattern.
This is the point where manual placement becomes genuinely laborious. The arrival times, their relative levels and the pan of the dry signal are one interlocking set, so moving the source anywhere means recalculating all of it, and every new source in the arrangement starts the process again.
Recheck the whole chain in context
Match levels between the processed and bypassed versions before judging anything, then compare them in the full mix rather than in solo. The processed version should read as farther away — not merely quieter, darker, narrower or wetter.
If you can identify one individual processor at work, reduce that stage and let the others carry more. Convincing depth comes from several small cues agreeing with each other, and any single cue pushed far enough to be audible on its own will sound like an effect instead of a distance.
You will not need every step on every source. A mono pad may need nothing more than the high shelf and a short reflection send; a wide, close-miked drum recording may need the entire chain. What matters is that the cues point in the same direction, because a source that is darker but still sharply transient, or narrower but still arriving before its own reflections, will read as processed rather than as distant.
Treat placement as one connected move
Virtual Stage FX was built to collapse that workflow into one spatial operation. You move the source on a visual stage while the relevant placement parameters change together.
It coordinates distance, width, horizontal balance, early reflections and room response instead of asking you to rebuild and retune the same chain for every source.
Virtual Stage FX is not a conventional reverb. Its primary job is deciding where a source sits in the mix, not surrounding it with an obvious reverb effect.
Maybe what you actually need is reverb
Sometimes “move it farther away” is not really the problem. What you actually want is to hear a recognisable room, hall, chamber or other acoustic environment around the source.
In that case, use a dedicated reverb. A good reverb gives you much deeper control over the character, reflections and decay of the space than a placement tool should.
A few long-established reverbs I would personally look at are Audio Ease Altiverb 8 , LiquidSonics Seventh Heaven Professional and ValhallaRoom . They approach reverb differently, but all three are mature tools designed specifically for creating and controlling acoustic space.